Rotary Tool Fixtures
Dozens of rotary tool fixtures and accessories are available on 3D-print community sharing websites. Some seem simple and effective, while others are quite elaborate. After looking through them all, it seemed to me that even the fancy ones would still require additional tooling to solve a lot of the problems I encounter.
So, I’m taking a different approach. Instead of attempting to make a single fixture that does it all, I make a new single-purpose fixture as each problem arises.
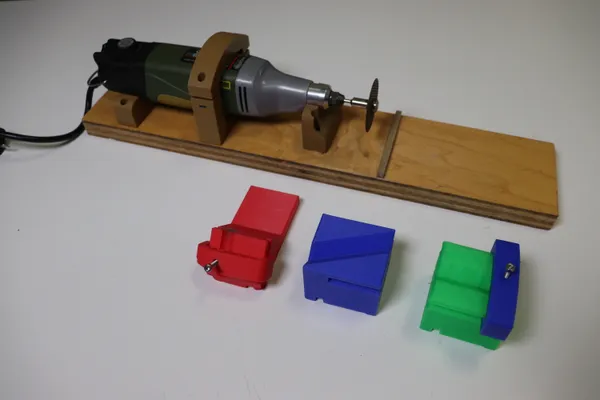
Rotary Tool Mount
For starters, I mount my rotary tool in a horizontal orientation.
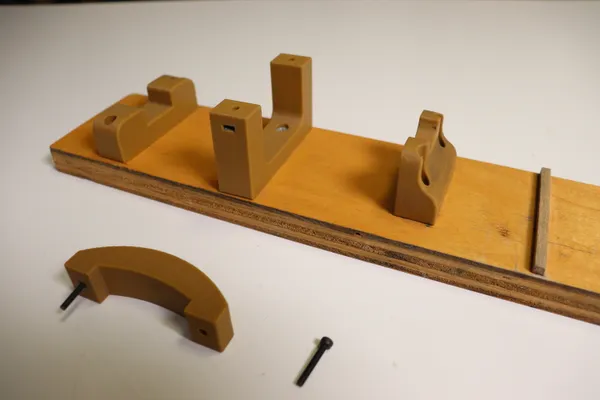
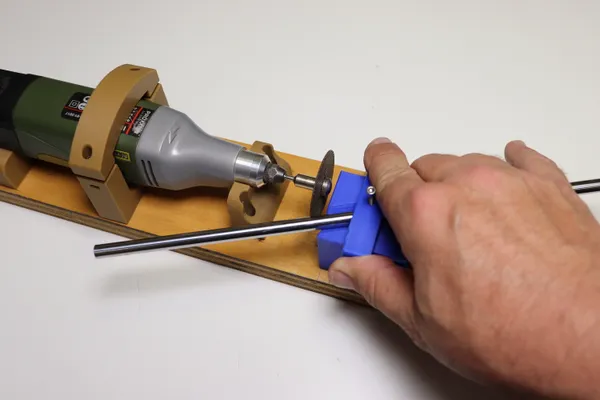
I fastened these parts to a scrap piece of plywood, which I can clamp to my bench if necessary. Usually it isn’t. I can remove the tool in seconds by removing the two center screws.
My rotary tool is a Proxxon IBS/E. I could not find any other mount made for this tool so I had to design my own. If you have a different brand, you may have better luck finding an existing design.

If you do have to design your own, I have a few tips. Notice that I have not bothered to model the entire rotary tool. I just did the portions that interface with my mount, skipping the detail. Also note that I didn’t try to make a cradle that perfectly fits the curved surfaces of the tool. Instead, I take advantage of the fact that the tail end of the tool has a squared section, while the business end is cylindrical. My tool is supported at these points and has a simple clamp in the middle to hold everything in place.
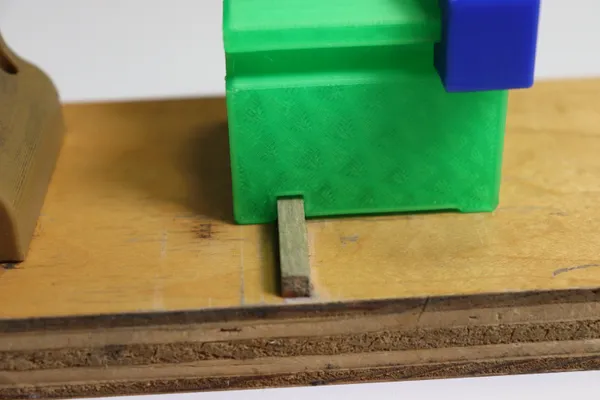
The mounting board has a 5mm wooden stick glued on, perpendicular to the tool shaft. My workpiece fixtures are notched on the bottom to ride on this stick. Since I generally want to advance the workpiece into the bit from the side, this seems like a good starting point.
Workpiece Fixtures
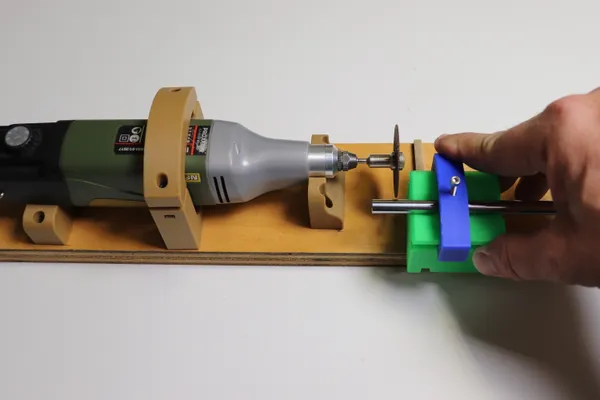
The workpiece tools below are used to cut or grind steel shafting, commonly used for linear guides in a 3D printer or small CNC machine. If you’re careful, this work can be done with a handheld rotary tool but it’s tedious.
The problem is that the process generates a lot of heat. I stop every 20 seconds or so, apply a damp sponge or cloth to the work, and/or wait until it’s cool to the touch before continuing.
Unfortunately all that stopping makes it difficult to do a clean, neat job, since you’re continually repositioning your hands and probably switching your attention to something else while waiting for the part to cool.
By clamping the tool in the fixture it’s easier to accurately resume work.
This guide is a cut-off fixture. Its use should be obvious.
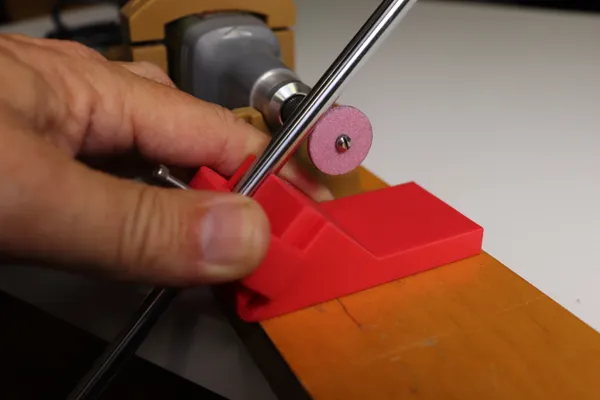
This guide is the same, but angled 25°. It allows cutting a long shaft in the middle, since there would be inadequate clearance otherwise. Then I use the first tool to clean up the cut.
This wastes a bit of material, but if you’re not doing it too often that may be okay, and is certainly cheaper than purchasing a specialized tool that will see little use.
The last one is for grinding what I call a set screw keyway. I use these when fixing 3d-printed parts to a rotating shaft using an embedded nut and set screw.
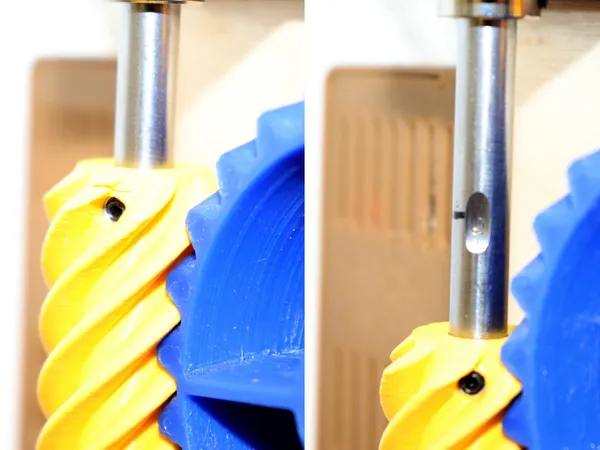
I first tried fixing the gear in place with no shaft preparation at all. I found I had to tighten the set screw so much that the plastic deformed in a few days and started slipping. I then tried grinding a conventional flat spot on the shaft, but that didn’t help. With the keyway, the set screw needs just moderate pressure to keep the gear in place. A drop of thread locker doesn’t hurt.
That yellow worm gear is from my animated workshop sign.
Try It Yourself
So, just three tools so far. As I add new capabilities, I’ll post updates to this page.
This article has been more about a philosophy than a specific tool. I hope it’s inspired you to think about this solve-problems-as-you-go approach to tooling.
If you do have a direct use for any of these fixtures, the STL and CAD files are available on Printables.com, or on my Github page. Good luck!